Menu
Find us on 192.com
Our other websites
WOOD BURNING STOVES KNOWLEDGE BASE AND FREQUENTLY ASKED QUESTIONS
By AG WalshView our range of conservatory ready wood burning stoves CLICK HERE
Full HETAS installation service available in Greater Manchester area.
.....back to articles index
FITTING A WOOD BURNING STOVE, LOG BURNER, OR MULTI FUEL STOVE IN A CONSERVATORY, OR OTHER ROOM WITHOUT A CHIMNEY. by AG Walsh
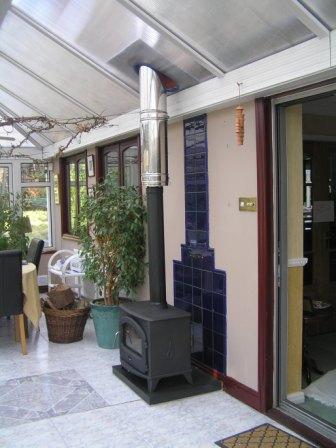 This is a question we seem to be getting asked more and more these days. "Can i install a wood burning stove if i have no chimney?". This question is usually asked with reference to conservatories, but applies equally to mobile homes, sheds, or other outbuildings as well as houseboats. The difficulty and expense of heating a conservatory or new extension to any property can be a big problem for people, but here is a beautiful, simple and elegant solution. A wood burning stove.
To begin with, ask yourself do you really want to extend your existing gas or electric central heating system into your new room, and have a plumber running new hot water pipes through your walls out there to another ugly radiator?
Or worse still, are you considering having an electrician gouging a channel along the wall to run an electrical cable out to run an expensive electric heater of some sort?
Many more people these days are ignoring these ideas and plumping for the warmth and beauty of a real fire in the form of a wood burning stove or multi fuel stove in their homes, so why not in a conservatory or new extension room?
 Of course the immediate problem is how do you get rid of the smoke without a chimney? Well the answer is that it can be done by building a chimney using a special insulated flue called "twin wall" that goes straight out through the roof of the conservatory. Twin wall flue is a flue pipe inside another flue pipe with a layer of insulation between them. This prevents all the heat being transferred to the outside of the pipe, so a twin wall pipe will still get hot, but not enough to damage a building or be a fire risk. If you pass a flue pipe through the wall or ceiling of any builidng, you HAVE to use twin wall flue pipe. This is in the UK Building Regulations, and if you fail to comply you can be prosecuted.
Firstly, you will want to decide on where your stove will be placed in your room, and this is an important decision as not only is it an aesthetic choice for you, it will affect where and how your flue will have to go through the roof and how you deal with the flue once it it exits through the roof.
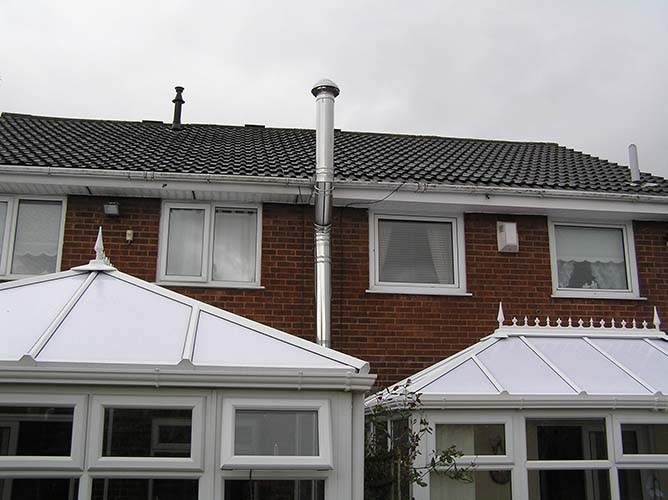 Remember that once the flue has gone up through the roof, depending on height, it may need to be secured to prevent it being blown over in strong winds.
If you site your stove close to the outside wall of you house, you will be required by building regulations to take the flue all the way up to above gutter height securing it to the outside wall of your property all the way up with pipe clips (As in the photo). This obviously requires a much longer length of twin wall flue and adds to the overall cost of doing the job - however this is not the ONLY choice.
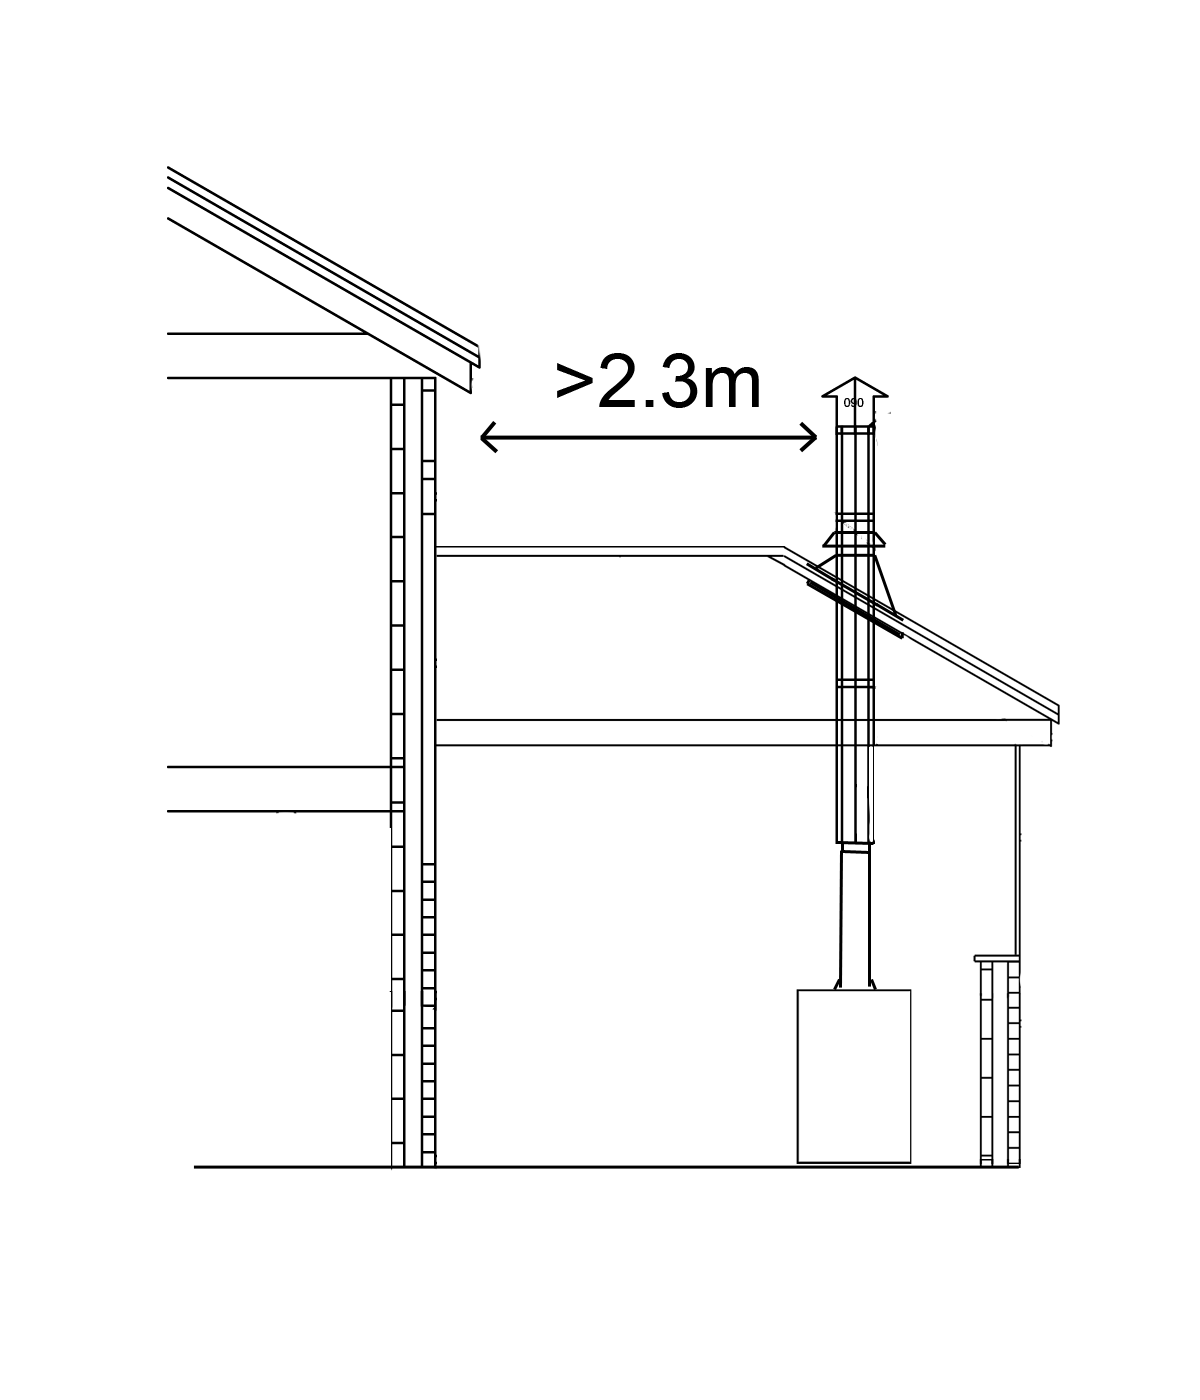 If you can situate your stove at least 2.3 metres away from the outside wall of your house, you only need to take the flue up by 1 metre above the roof of your conservatory, which obviously makes the job much cheaper and easier.
The crucial point here though is the flue has to be tall enough and be a wide enough diameter for enough "draw" to be created to so the stove works efficiently.
Please call us and have a chat about this because there is a lot of bad information given out by installers on this point who often misquote the Building regulations guidance on this point and put people off having the job done by leading them to believe you need some giant sized chimney on the back of their house!
Also at this point you should consider on what your stove willl be standing. If you have a lovely wood floor and stand a stove directly on it, you will again be breaching UK Building Regulations, but don't worry because your floor will have probably set on fire and burned your house down before the building inspectors ever got chance to call! 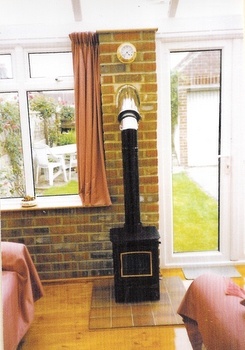
Most people would therefore put down a base of some sort. Tiles or stone would do the job and be an attractive feature (as in the picture on the right), but pretty much anything with low heat conductivity and stable enough to support the weight of the stove will be fine.
Please note that the Building Regulations require a non-flammable hearth material must extend at least 300mm in front of your stove (if it is loaded with fuel via a front door) and that the hearth you stand it on should be 50mm thick as a general rule - depending on which stove you choose.
Next you have to consider the size of the conservatory or room and choose a stove with a Kilowatt rating of the appropriate size so you don't over or under heat it. If you need help with this use our handy Kw calculator. Please bear in mind that a conservatory is less well insulated than a brick walled room so you should add a little extra to the kilowatt rating on the calculator.
However, if you pick a stove over 5kw rated, you will be required by the Building Regulations to put a ventilation brick in the wall. This is to ensure a sufficient supply of fresh oxygen for the stove to work efficiently, but also to allow any fumes a possible exit point to avoid any build up. Also note that the regulations require a carbon monoxide alarm is installed in the same room as the stove. This is because carbon monoxide is a natural by-product of burning solid fuels.
You may then need the assistance of a good builder or stove installer to help you set up the stove and flue pipe arrangement.
Of course if you are a keen DIY enthusiast, there is nothing to stop you doing it yourself - provided you ask your local Building Controls Dept to come out and certify it is a safe install when you have finished.
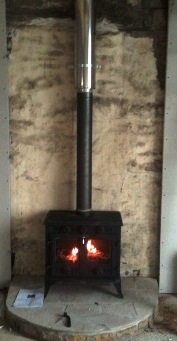 A quick and relatively simple way to begin this type of install is to use the conventional single wall vitreous steel/stainless steel flue pipe for the first sections coming out of the top (or rear) of your stove. This flue pipe will be visible in the room, so it is important to choose flue pipe you like the look of - whether it will be shiny chrome or a matt grey to match the stove colour - as in the photo on the left.
This length of flue pipe will also have an added heating bonus as it will radiate more heat into the room as the flue heats up when the fire in the stove gets up to temperature.
As the flue reaches near the ceiling height of your conservatory or extension room, you will need to change to twin wall insulated pipe, using an adaptor. You can clearly see the join in the picture on the left where it changes colour. In this example the twin wall flue pipe is starting lower down than ceiling height because this enables a false chimney breast to be formed from 3x2 timber and covered with heat resistant plasterboard.
This allows you to make a nice decorative feature of the stove in a new extension to a property but is not always quite so suitable in a conservatory where you will probably need to go straight up to the ceiling with standard flue pipe and then switch to twin wall flue to finish the job. Twin wall flue is usually chrome coloured but is also available in black for a little extra cost.
If this is a single storey extension you will also need to place a fire guard around any wooden joists in the roof void and continue out through the roof using the twin walled pipe use a flashing kit to seal the external roof and then finish with a suitable cowl with a rain cover and bird guard.
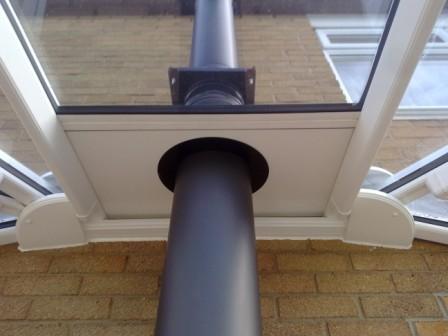 If this was a typical conservatory flue install, your installer would simply cut a suitable sized hole in one of the conservatory roof panels, using a jig saw - assuming your conservatory roof is polycarbonate. If you have a glass roof, it is more tricky and some people get a single replacement conservatory roof panel made with a pre-cut hole- as in the photo on the left.
Then, you run the twin wall flue out through the hole and connect it up outside and inside.
We sell a choice of twin wall flue systems - including in black powder coated finish if 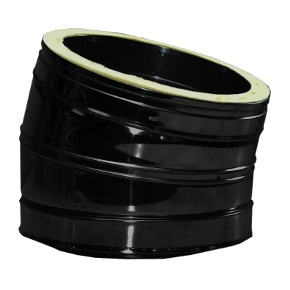 you would rather not have a silver coloured stainless steel chimney flue. We can also arrange to have twin wall flue powder coated to match any specific colour / RAL number if you want to colour match to a stove for example. (Please note this adds a 3 week wait time for the powder coating process)
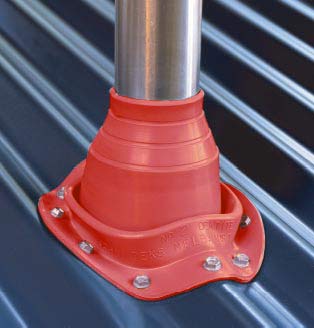
Next, you would then seal the point where the flue passes through the roof using a special EPDM "flashing kit" to prevent both water ingress and any possible heat loss.
These are fitted by pushing the twin wall flue through the rubber seal 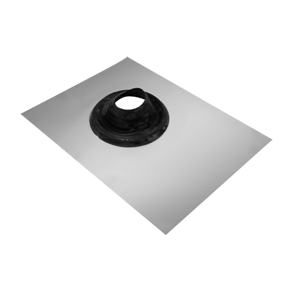 (which you cut to match the exterior size of your twin wall flue) and then securing the base plate to conservatory roof with nuts and bolts and/or a "no more nails" type adhesive, which is then finished off with a weather resistant silicone sealant to ensure a watertight seal.
The flashing sometimes comes attached to a square or rectangular aluminium plate as in the picture on the left. These are primarily used where you are taking a flue through a pitched tiled roof and the plate goes under the roof tiles. You can use them on a conservatory if the roof panels are large enough.
You can see this type of installation clearly on the picture right at the top of this article and on the left, the picture shows how an exterior flashing kit can provide a water tight seal on even a tricky corrugated roof.
This method can be used on most single storey flat or pitched roof buildings - even if they are tiled.
Typically the flashing kit is sealed to the roof surface using a weather resistant silicone sealant (provided with the flashing kit) to fill even the tiniest gaps.
It also provides some additional support and stability to the twin wall flue assembly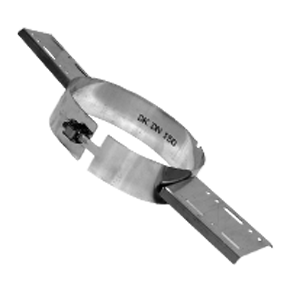 , but to help that further we also recommend fitting a roof support - as shown in the picture on the right.
This fits around the twin wall flue and the "wings" are then secured to the roof with bolts or screws. The EPDM flashing kit is then fitted over the top of this to seal the hole.
On the inside of the roof you fit a "finishing plate" which is pre-cut to fit exactly around the twin wall flue and give a perfect finish to cover the hole where the flue exits. (You can see this clearly on the first picture right at the top of this article)
 Finally you would need to add a rain/weathering cap on top of your flue to prevent water getting inside your flue and down into the stove.
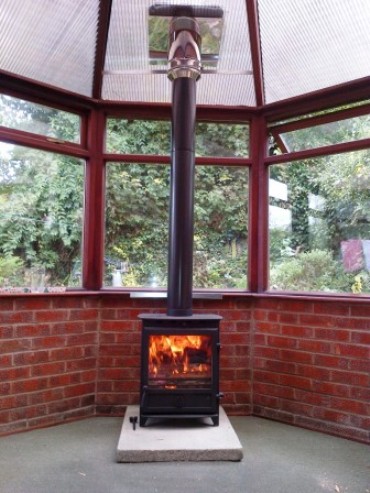
What you can end up with is a beautiful wood burning stove that looks something like the picture on the left with a single flue pipe coming from the top and a roaring fire to enjoy on those long winter nights ahead.
After all, you didn't add a conservatory or extension to your house to only use in the summer months did you?
(Photo above - click to see a bigger version) A StoveMaestro F8 DEFRA approved, British made 8kw wood burning stove our installer partners fitted. This exact stove and flue kit as in the picture is available for ONLY £1195 inc VAT and free delivery for a full DEFRA approved package. Call us to order on 0161 743 9567
OUR SPECIAL DEALS ON A 5kw STOVE AND EVERTHING YOU NEED TO INSTALL IT IN YOUR CONSERVATORY START AT AN AMAZING £799! (inc VAT and delivery)
IF YOU FOUND THIS ARTICLE HELPFUL PLEASE CLICK ON THE FACEBOOK "LIKE" OR GOOGLE PLUS ONE BUTTON BELOW AND LET OTHER READERS KNOW.
Please note these articles are inended for GENERAL GUIDANCE ONLY. We do not provide advice over the phone or by email to customers looking for help with a DIY install, and if you have bought your stove, twin wall flue or other installation kit from another supplier, we will not answer any questions or otherwise get involved in disputes or queries. Please check with your local council building controls department before commencing any work if you are unsure of the regulations.
Flue pipes and chimney liner for wood burning stoves in Manchester? Our trade counter is open to the trade and public alike so please visit us.
CONTACT US FOR MORE INFORMATION ON WOOD BURNING STOVES IN MANCHESTER
Address: Unit 7, The Cobden Centre, Vere Street, Salford, Manchester M50 2PQ
Phone: 0161 743 9567
Email: sales@stovemaestro.co.uk


